How to Make Chicken Wings in Power Air Fryer Oven
Both adults and kids adore chicken wings for their scrumptious taste. Interested in preparing savory Chicken Wings right in your kitchen? An air fryer stands as the optimal solution for this task. Crafting this dish in an oven is remarkably effortless and swift, also demanding minimal time. Discover the method for preparing chicken wings in a power air fryer oven.
Below, we will discuss all the steps of preparing the Chicken Wings in the Power Air Fryer Oven. Along with the recipe steps, you will find how long to cook, what temperature to cook, and other important data about the recipe. Keep reading the article to make your best ever Chicken Wings from the home.
Why Use Air Fryer Oven for This Recipe?
There are several ways to cook chicken wings. But not all the ways out there are equally easy and effective. We advise you to utilize the air fryer to make the chicken wings quickly. Compared to the other cooking procedures, the air fryer allows you to cook the chicken wings a whole lot faster. That’s not all; you also don’t need to go through a lot of steps while cooking in the automatic appliance.
All you need to do is to add the ingredients and set the time and temp. Your food will be ready within the specific time and you will be alarmed when done. So, there is no guesswork and very few chances of burning the food. The air fryer also doesn’t require much oil which makes the wings healthy. If you want to cook them on the stovetop or deep fryers, you will require submerging them in oil which is very unhealthy.
How to Make Chicken Wings in Power Air Fryer Oven
Chicken wings in the air fryer are so easy to prepare that you may not use any other ways after using an air fryer for the first time. Below, you will find the step-by-step guide on this. Make sure that you have gathered all the required ingredients for the recipe.
Here are the ingredients you will need:
- Chicken wings (as needed)
- Seasoned salt (1 tbsp)
- Hot sauce (3 tbsp)
- Flour (1/2 cup)
- Maple syrup (3 tbsp)
- Melted butter (2 tbsp)
Now here are the steps you need to follow:
Step 1: Preparation
Begin with removing the tips from the chicken wings. Also, separate the flats and drumettes. Now add the flour and salt to a medium bowl and mix them well. After that, toss the chicken wings in the mixture to coat them lightly. After coating the chicken, put them on a separate plate or bowl. In another bowl, add the hot sauce, melted butter, and maple syrup and mix them well.
Step 2: Preparing the Air Fryer
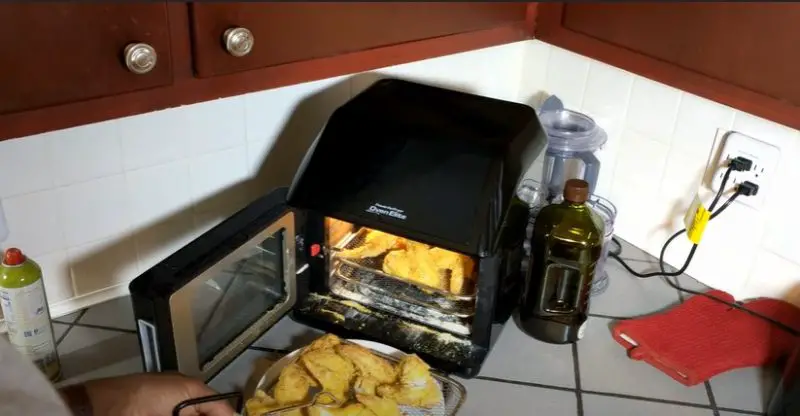
Position your air fryer on a heat-resistant surface like the kitchen countertop. Make sure that there is an electric outlet nearby to connect the device. After connecting the air fryer to the power source, this should light up. Now you can put it for preheating by pressing the specific button if there is any. If there is no preheating option, you can need to do this manually.
Begin with selecting the preferred temperature and time for preheating for this specific dish. We will recommend 400 F temperature for two to three minutes. Make use of the right buttons in the air fryer to adjust the time and temp. Note that preheating is not mandatory for this recipe but it is good to preheat for a crispier outcome.
Step 3: Put the Wings on Air Fryer Basket
Now take out the basket of the air fryer and spray the bottom with the cooking spray. Then organize the chicken wings in a single layer on the lowermost of the basket. Just add as many of them as you can in a single layer to assure perfect cooking. Trying to cook a lot of them will impact the air circulation inside the machine.
So, never add multiples layers of the chicken wings as this will cause uneven cooking. If you want to cook them in large quantities, you can cook them in smaller batches by repeating the steps. You may also utilize the air fryer racks if your device includes one.
Step 4: Set the Time and Temp
Now you require setting the preferred cooking duration and temperature for cooking the wings. Typically, the cooking temperature should be 370 F while the cooking duration is around 30 minutes. Note that the cooking period may vary based on several factors. While cooking the food for the first time, you need to check them frequently to take them off at the right time.
Step 5: Complete the Cooking
After starting the cooking, you need to flip or shake the chicken wings in half time to assure even cooking. When you are close to the cooking duration, begin checking the chicken wings frequently. Adjust the time based on their condition. You may increase the temp to 400 F for the last few minutes to make the wings crispier.
Be aware of overcooking as it can make the wings tougher. It is important to take them off as soon as they are ready.
Step 6: Take them Out
Now once the wings are perfectly cooked and crisped, take the basket out by holding it from the handle. Make sure you are not touching the basket and wings instantly as they will be very hot. After taking off, leave the basket on a heat-resistant surface for a few minutes. After a few minutes, you can move them using non-metal tongs. Toss them in the sauce to coat and then serve them warm for the best taste.
Conclusion
The chicken wings are one of our favorite dishes in the restaurant. Now you can make them easily in the home and get the same taste by following the above recipe. Note that you can adjust the seasoning or sauce based on preference to make them taste better in your mouth.


