How to Preheat Nuwave Air Fryer
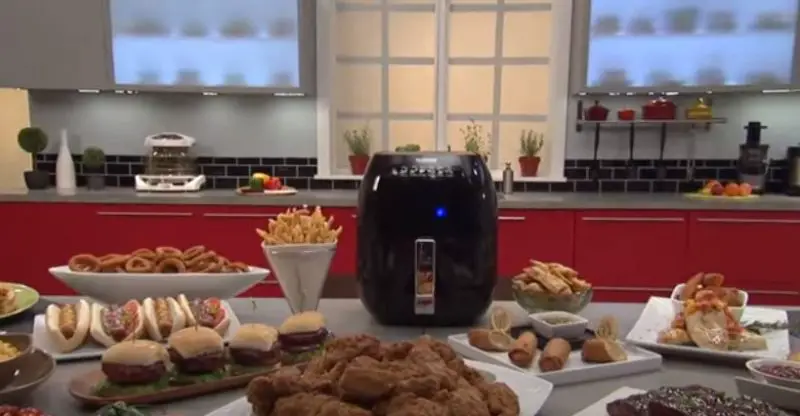
Within the array of air fryer brands available, the Nuwave Air Fryer stands out as a well-regarded and dependable choice. They are responsible for producing a variety of air fryers in the market. Should you have recently acquired a Nuwave Air Fryer, we encourage you to continue with this article. In the following section, we will guide you on how to preheat your Nuwave Air Fryer along with how to make the most of its various features.
Air fryer is an impressive way to prepare your food quickly with the minimal effort. It also assures you an even and consistent cook when compared to the other ways of cooking. However, to get the best out of your air fryer, there are some certain things that you need to know about the device.
Below, we will discuss how to utilize Nuwave Air Fryer in the right way.
What is the Right Way to Preheat Nuwave Air Fryer?
Preheating your Nuwave Air Fryer is a very easy work. You will find detailed guide on the user manual that arrives with the air fryer about preheating. However, if you are still confused, we may utilize the below guide. Below, we will let you know how to preheat the Nuwave Air Fryer in step by step.
Step 1: Turn on the Device
Begin with connecting the Nuwave Air Fryer to a nearby electric outlet. Now press the on/off switch to turn on the device. This will begin the operation of the air fryer. Now press the pre-heat button below the digital control panel to start preheating.
Step 2: Set the Temperature
Now set the temperate for preheating. Press the Temp/Time button to set the cooking time and temperature. Pressing it for once will allow you to choose the temp. Pressing it again will allow you to update the time.
Although it can varies depending on the recipe, the usual preheating temperature is around 350 degrees to 400 degrees F. You can also choose to preheat in the default temperature, which is 360 degrees F. You will not require pressing any button for this.
Step 3: Begin the Process
To start the preheating process, press the Start/Pause button in the digital touch screen. This will initiate the preheating process. You will get a beep signal once the air fryer reached the temperature you set. It will also show you ready sign in the screen. You will require entering the food into the basket within five minutes after preheating.
How to Use Nuwave Air Fryer
The above section of the blog described you how to preheat a Nuwave Air Fryer for cooking. Now let’s see how you can utilize the machine properly for cooking. If you have prior experience with other air fryers, you will definitely find the guide same in some extent. Now, let’s see the step by step guide on how to use the Nuwave Air Fryer.
Step 1: Begin with Cleaning
The first thing we will recommend you to do is to clean the accessories of the device with a mild dish soap and rinse with water after that. Accessories need to be cleaned include the base tray and basket. Make sure to dry them properly after completing cleaning.
Step 2: Position the Air Fryer
The next thing you need to do is to position the air fryer in a heat resistant and stable surface. Your kitchen countertop may be a good space for this. Make sure that the place is free from water and there is nothing near that can block the air vents.
Step 3: Turn on the Air Fryer
Now connect the air fryer to an electric outlet. Make use of the on/off button to turn it on or off. You will find the button in the digital touch screen. After turning the button, you will find that the control panel is now active and show you “0” as you didn’t select the temperature and cooking duration.
Step 4: Add the Food
Now you can add the food in the air fryer. Make use of the handle on the device to bring out the basket. Put the food in a single layer with enough space for proper air circulation. Never add multiple layers of food as it can cause uneven cooking.
Step 5: Begin the Operation
After adding the food in the air fryer, click on the Start/Pause button to enable the default setup for cooking. It consists of 360-degree F temperature and 10 minutes of cooking. Use the Start/Pause button to pause and resume cooking. This will allow you to remove the food tray to check how is the cooking going. If you want to pause the machine to stop cooking, you should turn on/off button.
Step 6: Adjusting the Time and Temperature
You should get a recipe book with the Nuwave Air Fryer. The recipe book will show you how to cook different types of food in the machine. It will also include the required temperature and cooking time. Make use of the Temp/Time button in the digital screen to update the setting. Press 1 time in the button to access the temperature control.
Then use the up/down arrows in the screen to lower or increase temperature. It will change in 5-degree F increment. If you want to change at 50-degree increment, hold the arrow down button. To access the time setting, press the option twice. Now you can update the time from 10 minutes at 1 minute interval. You may hold down the buttons to increment/decrease at large orders.
Step 7: Cooking the Food
Once you set everything correctly, the cooking process will begin. Wait for the duration and your food will be ready to consume. Press on Start/Pause button to pause the cooking and take out the basket. If it requires you can put it back for cooking for few more minutes. If you want to stop cooking, press “Start/Stop”.
Conclusion
A Nuwave Air Fryer can be a great way to cook your food easy, efficiently, and fast. However, you must utilize the machine in the right way to get the best performance. We hope the above guide will help you to get the best out of your Nuwave Air Fryer.


