How To Cook Chicken Over A Fire
Cook Like The Experts Do: Learn How To Cook Chicken Over A Fire
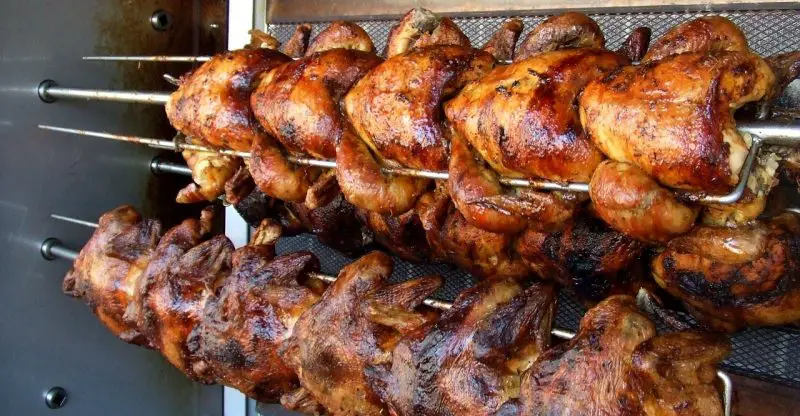
Who doesn’t love a succulent rotisserie chicken? From enjoying mouth-watering chicken breasts to biting into the crispy skin of a juicy drumstick, there is nothing quite like the smokey flavor of this classic dish. One way to get this dish to soar that is often overlooked, however, is to cook the chicken whole over an open fire.
Just imagine the aromas and smoky flavor that will envelop the chicken, from the wood, smoke, and roasted spices. Using an open fire to rotisserie is a whole experience that can never be achieved in an oven or from the stovetop. So, why is it often overlooked? Well, many believe that setting a fire and hanging their chicken is a complicated task, but that could not be further from the truth. Cooking your chicken over a fire is simple if you understand the steps involved, and as usual, we’ve got you covered. This post will walk you through all the steps required to learn how to cook a chicken over a fire.
Preparing Your Chicken
To prepare a chicken for cooking over an open fire there are 3 main steps you will have to achieve. These are seasoning your chicken, getting your chicken trussed, of course setting your fire. Let’s explore these steps individually.
-
Seasoning Your Chicken
The correct way to seasoning your chicken is subjective. You are free to use whatever seasoning you have on hand or whatever seasoning you prefer to taste. To start generously rub the chicken in olive oil. This will help with crisping the skin while cooking as well as getting the seasoning to adhere to your chicken. Next, add your selected flavoring agents and spices. Popular options include salt, paprika, Cajun seasoning, and pepper but you are free to incorporate any ethnic flavors or spices you grew up with.
Don’t forget to add some of that seasoning inside the chicken cavity!
After you are done with your seasoning it’s time to move on to trussing.
-
Getting Your Chicken Trussed
Trussing, though fancy as it may sound, simply means to wrap, or tie in string. This action aids in your chicken holding its shape while cooking as well as helps you to properly hang it while cooking. Don’t go panicking just yet, this step is also easy to accomplish.
There is a myriad of ways to truss a chicken, none of which or right or wrong per se. The key is to ensure that your butcher’s string (generally available at local grocery stores) is securely tied around your chicken. To begin cut about 5 feet of butcher’s string then set it to soak in water for a few minutes, This will ensure that it is moist and will not burn when cooking. Lay your seasoned chicken on its back, then place the string underneath it before positioning it about mid-way down the back of the chicken.
Next lift both ends of the string then cross it, allowing it to hang around the middle of the chicken’s legs. Pull on both ends. The legs will be slightly pushed forward. Placing pressure on the string, wrap both ends around the base of the chicken legs from the outside inwards then bring the ends of your string to the neck of the chicken. Be sure to always maintain pressure on the string so it doesn’t get loose. Finally, bring both ends back to the center of the chicken where they crossed, pulling to ensure it’s tightly trussed, then tie it off around where the string meets in the middle of the chicken.
Believe it or not, that’s it! Now it’s time to move on to the fire.
-
Setting the Fire
Having good wood is essential to not only have a good fire but also determining the aroma and smoky flavor your chicken will have. Good wood choices for cooking include mesquite, hickory, apple, cherry, or oak. They all give unique flavors, but hickory and oak tend to be the most common for cooking hanged chicken as it results in a nice smokey flavor.
To get the fire going you want to create a nice controlled stack, set it ablaze then build it slowly adding more logs one at a time until you achieve a decent-sized flame for cooking. Unlike cooking in an oven, you won’t have a temperature gauge to tell you when you’ve hit an even 400 degrees. So, try to add logs until you can hold your hand about 4 inches above the flame for only about 3 – 4 seconds before needing to move it.
Remember it’s easier to add logs than remove them, so be sure to test after adding each additional log. You want to have your fire large enough to surround your chicken in flames. Consider making a brick oven out of cinder blocks to help control the direction of the flames.
That’s it! Now it’s time to explore how to cook chicken over a fire.
How to Cook Chicken Over a Fire
Now that your chicken and fire are prepped, it’s time to cook! To begin, use string to hang your chicken on an S-hook then set it up about 3 or so feet above your fire. How you hang the S-hook is up to you. You can opt to use a custom rig, a tripod, or a simple stick. The key is to ensure that your chicken has enough support to hang for four to five hours as that’s how long it will take to thoroughly cook.
When you first hang the chicken, you want to position the chicken breast so that it is closest to the fire. This may sound strange, but the heat from the fire will penetrate whatever part of your chicken is towards the top first. So, you want to ensure that is where the base of your chicken is, as it will take the longest to cook. Set the chicken like this for about an hour or so.
For the second hour, you want to adjust the chicken so that it hangs from the back. This will ensure that your breast continues to slowly cook while speeding up the cooking of the sections with darker meat. During the next hour, set the chicken legs and wings to roast by hanging the chicken from its neck.
In the fourth hour, turn the chicken so it hangs from its breast to give the back of the meat some attention. Then finally, return the chicken to hang from its back in the last 30 minutes so that the whole bird gets heated through.
By now, your chicken should be fully roasted. Check to ensure that your internal temperature is around 165F. If it is then your chicken is done. If not, re-truss your chicken then return it to the fire, hanging from the back until it gets to where it needs to be then enjoy with a cold beer or some iced tea.
Final Thoughts
Cooking chicken over an open fire doesn’t have to be hard. In fact, it can be pretty therapeutic under the right circumstances. It does, however, take a few hours to cook so, consider grabbing a few cold beers or god company and make an event out of it because good flavor is never something you should be afraid of.


