Aigerek Air Fryer How to Use
The Aigerek Air Fryer has entered the market relatively recently yet its popularity has soared remarkably in a short period. This surge in popularity can be attributed to its dependable functionality coupled with impressive features. Additionally, the air fryer can be purchased at a reasonable price. If you’ve acquired an Aigerek Air Fryer, continue with this article. We’re here to guide you on how to operate the Aigerek Air Fryer.
Below, you will find an entire guide on how to efficiently the Aigerek Air Fryer right out of the box. Even if you have no prior experience with the device, this guide will help you use it accurately.
Introduction to Aigerek Air Fryer
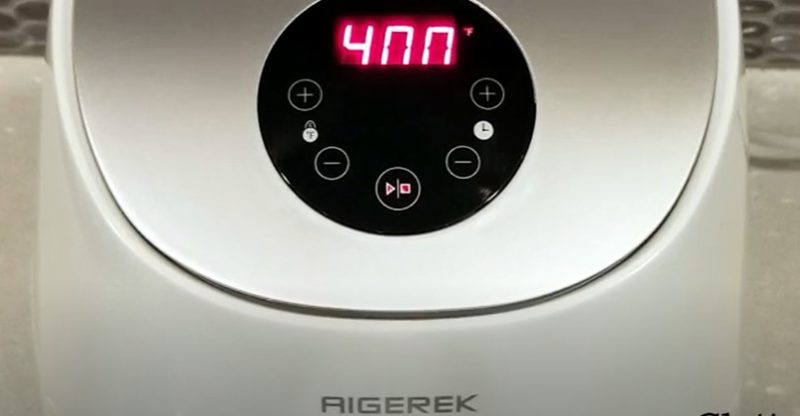
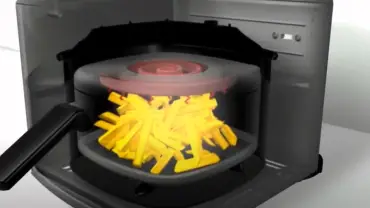
Although not a popular brand, the Aigerek Air Fryer utilizes dynamic AirFlow Technology. This means it can expose the food to hot air from all angles. As a result, your food will be cooked perfectly from all around, assuring perfect and even cooking. There are also time and temperature control features in the air fryer. You can adjust the time from 160 degrees to 400 degrees using a specific knob. Besides, the time can be controlled from 1 minute to 30 minutes.
One of the unique features of the air fryer is its automatic shut down feature. This will turn off the air fryer after five minutes if you don’t press any button 5 minutes after the alarm goes off. Another excellent feature of the air fryer is its cool-touch exterior. That means there are no chances of accidentally burning your fingers by touching them. You will also get a cookbook with the air fryer with various recipes.
Aigerek Air Fryer: How to Use
The Aigerek Air Fryer is a comparatively a new product in the market although its reputation is rising. If you have an Aigerek Air Fryer, you first need to know how to use the device. Below, you will find step by step guide on how to cook on the Aigerek Air Fryer for the first time.
Step 1: Remove the Packaging
If you have just received the air fryer, then the first thing you need to do is to remove all the packaging materials. To be more specific, you need to remove all the boxes, stickers, labels, and others. You will find the pan, basket, and other accessories in the box. Remove the pan and basket from the air fryer if they are attached and clean them. Make use of dishwashing soap along with a non-abrasive sponge and hot water to clean the basket and pan.
You may clean the accessories in the dishwasher if they are marked dishwasher safe. After that, make use of a clean and dry washcloth to wipe the exterior and interior of the main compartment of the air fryer. Never submerge the air fryer device in any liquid as it will cause malfunction and void the warranty.
Step 2: Read the User Manual
Every electric appliance arrives with a user manual that let includes an in-depth and detailed guide on using procedures and other important aspects of the device. This will also include adequate information on cleaning and maintaining the appliance. If you have the user manual, we will recommend you to go through the user manual first to know the correct procedure of operating the air fryer.
Step 3: Set the Air Fryer
Once you have done the above steps, the next thing you need to do is to put back the accessories in their compartment and placed the device on a flat surface. There should be a nearby electric outlet so that you can easily connect it for power. This will turn on the air fryer. Now you can preheat the device if it is necessary for the food, you are cooking. In case you don’t know, preheating is the process of warming it up just like you warm up the pan while cooking in the stovetop.
The preheating needs to be done with an empty basket. Basically, you need to run the air fryer for 3 to 5 minutes at around 350 F temperature for preheating. Use the temperature and time control button in the air fryer to adjust the machine for preheating. If you don’t want to preheat, simply skip the step.
Step 4: Add the Food
Now slide out the air fryer basket and add the ingredients to the bottom of the air fryer basket. Note that you should never fill the air fryer basket with food. This will cause uneven cooking. Simply add as much as you can in a single layer with little gaps in between. Adding a lot of food in the basket in multiple layers will cause uneven and inconsistent cooking.
Don’t stress, if you want to cook a lot of food at once. All you need to do is to cook in smaller batches following the same steps again. This assures the best outcome.
Step 5: Adjust the Cooking Time and Temp
Now you need to settle the cooking duration along with the cooking temperature. Refer to the recipe you are following to know the required cooking time and temperature. You can also check the recipe book that arrives with the Aigerek air fryer. Employ the time control and temperature control button to adjust the specific time and duration.
Once you begin the cooking, there is nothing much you need to do. The air fryer will produce buzz when the food is cooked for the settled time. You may flip or rotate the ingredients in halftime to assure better cooking. Take off the basket for doing this and put it back to resume the cooking.
Step 6: Complete the Cooking
When the food is cooked for the settled time, you will hear the buzz. Now you can turn off the air fryer and take out the food. At first, remove the basket from the air fryer by holding it from the handle and put it on a heat-resistant surface. After leaving it for a few minutes to cool down, you can then transfer the food to a serving plate using non-metal tongs.
Conclusion
The Aigerek Air Fryer can be a great way to make your cooking easier and healthier. While using the device for the first time, we recommend you make use of the guide for the best performance. We hope you will be able to effectively utilize the air fryer using the above guide.


