How to Cook a Bottom Round Roast in An Air Fryer
The bottom round roast, a favored beef cut, is both budget-friendly and straightforward to prepare. It originates from the rear and lower leg areas, making it a leaner choice with more muscle and less fat content. If your quest is for a tried-and-true bottom round roast air fryer recipe, you’ve landed in the perfect spot. Herein, we’ll provide you with a detailed walkthrough on how to prepare a bottom round roast using an air fryer.
A beef roast is something you may not think of cooking in the air fryer. However, you will be amazed to know that beef roast in an air fryer comes out impressively good and flavourful. Moreover, as the recipe doesn’t require much oil, the roast will also be healthy with lower fat and fewer calories. Let’s see how to cook the bottom round roast cut in the air fryer.
Why Use Air Fryer for Cooking the Roast?
When it comes to roast, people typically prefer the stovetop or the oven. However, the air fryer also is a great way to cook the dish. An air fryer work like the oven, which means there is not much difference in cooking in these two appliances. One of the main benefits of cooking in the air fryer is it requires little to no oil. If you are concerned about health, you should make use of the air fryer to cook the roast. This way you can assure less fat and calories.
Another impressive benefit of the air fryer is it allows you to cook the roast as you want. If you are short on time, you can quickly cook it at a high temperature. But if you prepare slow cooking, you can also do this in an air fryer by making use of its controlled temperature. Using an air fryer also assure that you don’t need a lot of cleaning. Especially, there will not any messy pan with grease to clean like a stovetop.
How to Cook a Bottom Round Roast in An Air Fryer
Now we will discuss the steps that you need to follow for cooking the bottom round roast in an air fryer. Note that you may also use the same steps for cooking the other cuts like top round, the eye of round, etc. Let’s see the steps you need to follow for the cook up:
Ingredients:
- Bottom Round cut of Beef (as needed)
- Steak seasoning (2 tsp)
- Avocado oil or other cooking oil (1 tbsp)
Here are the steps you need to follow:
Step 1: Preparing the Steak
Let’s begin with seasoning the bottom round steak. At first, take off the roast from the freezer and bring it to room temperature. Brush or spray the cooking oil in the air fryer. Then sprinkle the steak seasoning on both sides of the steak. You can use the commercially available seasoning or create a mixture at home with your favourite spices. Some other things you may consider adding include garlic powder, herbs, salt, and pepper.
If there are multiple spices or herbs, we will recommend you mix them fast in a small bowl with the oil. Then use a brush or your hand to coat the meat with the mixture.
Step 2: Setup the Air Fryer
Make your air fryer ready for cooking by attaching the required components. Then position in a flat surface near to an electric outlet. Connect the air fryer with the empty basket for the purpose of preheating. Although preheating is optional, we advise you to do this for a better cooking result. Preheat the machine for around 5 minutes at a 390 F temperature. Make use of the specific buttons to run the preheating.
Step 3: Put the Cut in Air Fryer
Once the preheating is done, slide out the air fryer basket from the device and put on a heat-resistant surface. Now add the seasoned beef cut in the middle of the basket. If there are multiple, put them in the basket with gaps in between in a single layer. Don’t try to cook much roast at once as it will cause uneven cooking. You can always cook in smaller batches for the best result. If there are racks, you may also stack them without blocking the air circulation.
Step 4: Time to Cook
Once you have added the roast to the air fryer basket, you now slide it back to its compartment and begin the cooking. At first, set the cooking for 15 minutes. The temperature doesn’t need to be changed as it will be the same as preheating. After setting the time, allow it to cook. When you hear the timer, slide out the air fryer basket again and flip to cook both sides properly.
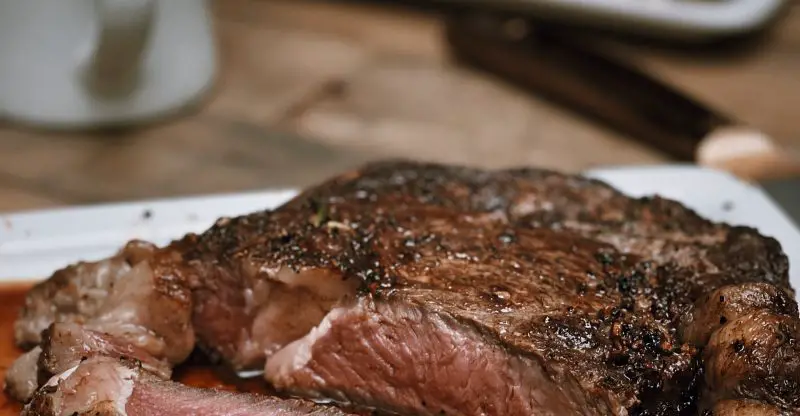
After doing that, you need to put back the roast to cook for around 10 to 12 minutes. Let’s cook it for the remaining time. Note that the cooking duration may vary a bit based on the air fryer unit. Moreover, you will also need to adjust the time depending on how you like it. The mentioned time is for a medium-rare outcome. So, begin checking frequently when you are close to the 10 minutes and adjust the time later if needed.
Step 5: Complete the Cooking
Once the roast has cooked perfectly as you wanted, you can stop the air fryer. Then take off the basket from the device by holding it from the handle. Make sure you are not touching the food or the basket in the meantime as it will be very hot. After taking the basket off, put it in a heat-resistant surface and leave it for a few minutes to cool down. Then use non-metal tongs to move the roasts to the serving plate.
That’s it your roast is now ready. You can serve it with mashed potato, BBQ sauce, or any other thing you want.
Conclusion
If you have never tried roasting in the air fryer, you should give it a try. As you above, it is impressively easy and there are fewer chances of failure with the alarm. We hope you will find the recipe useful for cooking the roast in the air fryer.


